Would you like to create a login form using only HTML and CSS programming languages?
If your answer is yes, I will help you create an animation login form.
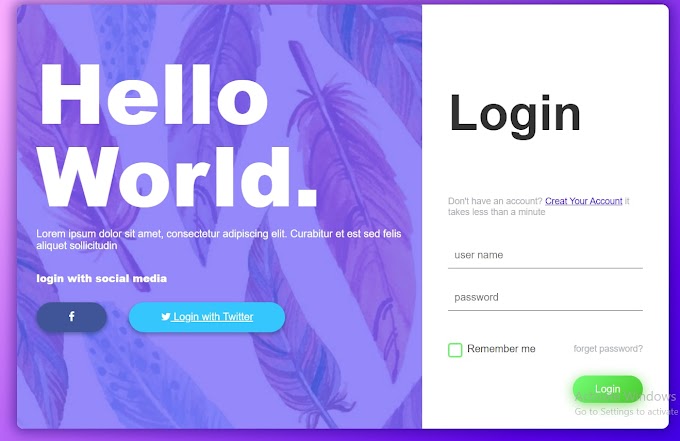
This login form is basically made using HTML and CSS programming language which is very simple and straightforward. This login form will fully help you to learn and know how to create an animation login form. The code used here is very easy for you to learn and know very well. The login form is one of the most important parts of web design and web development. It is very important to know a computer engineer or a web designer. The login form is basically the gateway to access your account on any website. For example, suppose you have created your own account on a website and want to log in or log in to that account. For that, you have to go through your entrance with your user ID and password. This is why a login form is used. A professional login form helps to increase the quality of a site a lot. With all this in mind, I have come up with this professional and fully responsive login form for you. Which is made only with the help of HTML and CSS programming languages.

Some special information about this login form
1. This login form is a fully professional and responsive login form created using only HTML and CSS programming languages.
2. It is fully responsive, which means it can adapt itself to a variety of devices. Which is very necessary for a professional login form.
3. It has been made Responsive Some special code has been used, an example of which I have given below.
4. This form has been made responsive using the following codes.
@media (max-width: 980px) {
.box-form {
flex-flow: wrap;
text-align: center;
align-content: center;
align-items: center;
}
}
.box-form div {
height: auto;
}
.box-form .left {
color: #FFFFFF;
background-size: cover;
background-repeat: no-repeat;
background-image: url("https://i.pinimg.com/736x/5d/73/ea/5d73eaabb25e3805de1f8cdea7df4a42--tumblr-backgrounds-iphone-phone-wallpapers-iphone-wallaper-tumblr.jpg");
overflow: hidden;
}
.box-form .left .overlay {
padding: 30px;
width: 100%;
height: 100%;
background: #5961f9ad;
overflow: hidden;
box-sizing: border-box;
}
.box-form .left .overlay h1 {
font-size: 10vmax;
line-height: 1;
font-weight: 900;
margin-top: 40px;
margin-bottom: 20px;
}
.box-form .left .overlay span p {
margin-top: 30px;
font-weight: 900;
}
.box-form .left .overlay span a {
background: #3b5998;
color: #FFFFFF;
margin-top: 10px;
padding: 14px 50px;
border-radius: 100px;
display: inline-block;
box-shadow: 0 3px 6px 1px #042d4657;
}
.box-form .left .overlay span a:last-child {
background: #1dcaff;
margin-left: 30px;
}
.box-form .right {
padding: 40px;
overflow: hidden;
}
5. Here you can log in by clicking on the login button with your user ID and password.
6. This is a very nice and professional login form which is designed in a very beautiful and colorful way. In addition, there is the option of creating an account, which means that if any of your users do not have an account, he can create an account. There are also options to share on social media such as Facebook and Twitter.
Common and simple programming languages such as HTML and CSS programming code have been used to create this login form. Which will help you to fully learn and know how to create a Professional Responsive Login Form. You can download all the code by clicking on the download button above. For your convenience, all the programming codes used in this form are given below. You can copy the codes and use them on your website or personal project. Here's how to use this code in your project. You can follow this instruction and attach this login form to your website or project.
How To Create HTML Login Form Using Code
Hopefully from the video above you can fully understand how to make and work this transparent login form. If you want to try this code yourself, you can. That is why I have given the source code below. First of all, you create an HTML file (rename.html) and a CSS file (rename.css). Then you put the HTML code in the HTML file and the CSS code in the CSS file. Be sure to link the HTML and cis code to each other (<link rel="stylesheet" href="sidebar.css">).
I would especially request you not to copy the codes below, but to download by clicking on the download button above. Because when I uploaded these codes, I had some problems with Google. So I added some comments to it. If you wish to use these codes, you may omit these comments. If you do not interrupt, there will be no problem, meaning the comments used here will not change your coding or programming.
HTML TAGS (<body> Add Code </body>)This code is an HTML code (rename.html). Put this code in the head tags of your project and also in the head tags in the HTML file.
<div class="box-form">
<div class="left">
<div class="overlay">
<h1>Hello World.</h1>
<!-- <div class="card">
<div class="left">
<img src="https://www.dropbox.com/s/e928cht0h5crcn4/shoe.png?raw=1" alt="shoe">
<i class="fa fa-long-arrow-left"></i>
<i class="fa fa-long-arrow-right"></i>
</div>-->
<p>Lorem ipsum dolor sit amet, consectetur adipiscing elit.
Curabitur et est sed felis aliquet sollicitudin</p>
<span>
<p>login with social media</p>
<a href="#"><i class="fa fa-facebook" aria-hidden="true"></i></a>
<a href="#"><i class="fa fa-twitter" aria-hidden="true"></i> Login with Twitter</a>
</span>
</div>
</div>
<!-- <div class="card">
<div class="left">
<img src="https://www.dropbox.com/s/e928cht0h5crcn4/shoe.png?raw=1" alt="shoe">
<i class="fa fa-long-arrow-left"></i>
<i class="fa fa-long-arrow-right"></i>
</div>-->
<div class="right">
<h5>Login</h5>
<p>Don't have an account? <a href="#">Creat Your Account</a> it takes less than a minute</p>
<div class="inputs">
<input type="text" placeholder="user name">
<br>
<!-- <div class="card">
<div class="left">
<img src="https://www.dropbox.com/s/e928cht0h5crcn4/shoe.png?raw=1" alt="shoe">
<i class="fa fa-long-arrow-left"></i>
<i class="fa fa-long-arrow-right"></i>
</div>-->
<input type="password" placeholder="password">
</div>
<br><br>
<div class="remember-me--forget-password">
<!-- Angular -->
<label>
<input type="checkbox" name="item" checked/>
<span class="text-checkbox">Remember me</span>
</label>
<p>forget password?</p>
</div>
<!-- <div class="card">
<div class="left">
<img src="https://www.dropbox.com/s/e928cht0h5crcn4/shoe.png?raw=1" alt="shoe">
<i class="fa fa-long-arrow-left"></i>
<i class="fa fa-long-arrow-right"></i>
</div>-->
<br>
<button>Login</button>
</div>
</div>
CSS CODE (<head><style> Add code</style></head>)
This code is a CSS code (rename.css). You enter this code in the style tags in the head tags of your project. Also, you put in the style tags in the CSS file.
body {
background-image: linear-gradient(135deg, #FAB2FF 10%, #1904E5 100%);
background-size: cover;
background-repeat: no-repeat;
background-attachment: fixed;
font-family: "Open Sans", sans-serif;
color: #333333;
}
/* color: white;
position: relative;
left: -10px;
font-family: 'Lato';*/
.box-form {
margin: 0 auto;
width: 80%;
background: #FFFFFF;
border-radius: 10px;
overflow: hidden;
display: flex;
flex: 1 1 100%;
align-items: stretch;
justify-content: space-between;
box-shadow: 0 0 20px 6px #090b6f85;
}/*min-height: 100vh;
padding: 2rem 0;
background: #40424a;
color: #e4e4e8;*/
@media (max-width: 980px) {
.box-form {
flex-flow: wrap;
text-align: center;
align-content: center;
align-items: center;
}
}
.box-form div {
height: auto;
}
.box-form .left {
color: #FFFFFF;
background-size: cover;
background-repeat: no-repeat;
background-image: url("https://i.pinimg.com/736x/5d/73/ea/5d73eaabb25e3805de1f8cdea7df4a42--tumblr-backgrounds-iphone-phone-wallpapers-iphone-wallaper-tumblr.jpg");
overflow: hidden;
}
/* color: white;
position: relative;
left: -10px;
font-family: 'Lato';*/
.box-form .left .overlay {
padding: 30px;
width: 100%;
height: 100%;
background: #5961f9ad;
overflow: hidden;
box-sizing: border-box;
}
.box-form .left .overlay h1 {
font-size: 10vmax;
line-height: 1;
font-weight: 900;
margin-top: 40px;
margin-bottom: 20px;
}/*min-height: 100vh;
padding: 2rem 0;
background: #40424a;
color: #e4e4e8;*/
.box-form .left .overlay span p {
margin-top: 30px;
font-weight: 900;
}
.box-form .left .overlay span a {
background: #3b5998;
color: #FFFFFF;
margin-top: 10px;
padding: 14px 50px;
border-radius: 100px;
display: inline-block;
box-shadow: 0 3px 6px 1px #042d4657;
}
/* color: white;
position: relative;
left: -10px;
font-family: 'Lato';*/
.box-form .left .overlay span a:last-child {
background: #1dcaff;
margin-left: 30px;
}
.box-form .right {
padding: 40px;
overflow: hidden;
}
@media (max-width: 980px) {
.box-form .right {
width: 100%;
}
}/*min-height: 100vh;
padding: 2rem 0;
background: #40424a;
color: #e4e4e8;*/
.box-form .right h5 {
font-size: 6vmax;
line-height: 0;
}
.box-form .right p {
font-size: 14px;
color: #B0B3B9;
}
.box-form .right .inputs {
overflow: hidden;
}/*min-height: 100vh;
padding: 2rem 0;
background: #40424a;
color: #e4e4e8;*/
.box-form .right input {
width: 100%;
padding: 10px;
margin-top: 25px;
font-size: 16px;
border: none;
outline: none;
border-bottom: 2px solid #B0B3B9;
}/* color: white;
position: relative;
left: -10px;
font-family: 'Lato';*/
.box-form .right .remember-me--forget-password {
display: flex;
justify-content: space-between;
align-items: center;
}
.box-form .right .remember-me--forget-password input {
margin: 0;
margin-right: 7px;
width: auto;
}/*min-height: 100vh;
padding: 2rem 0;
background: #40424a;
color: #e4e4e8;*/
.box-form .right button {
float: right;
color: #fff;
font-size: 16px;
padding: 12px 35px;
border-radius: 50px;
display: inline-block;
border: 0;
outline: 0;
box-shadow: 0px 4px 20px 0px #49c628a6;
background-image: linear-gradient(135deg, #70F570 10%, #49C628 100%);
}
label {
display: block;
position: relative;
margin-left: 30px;
}
/*min-height: 100vh;
padding: 2rem 0;
background: #40424a;
color: #e4e4e8;*/
label::before {
content: ' \f00c';
position: absolute;
font-family: FontAwesome;
background: transparent;
border: 3px solid #70F570;
border-radius: 4px;
color: transparent;
left: -30px;
transition: all 0.2s linear;
}
label:hover::before {
font-family: FontAwesome;
content: ' \f00c';
color: #fff;
cursor: pointer;
background: #70F570;
}
label:hover::before .text-checkbox {
background: #70F570;
}
/*min-height: 100vh;
padding: 2rem 0;
background: #40424a;
color: #e4e4e8;*/
label span.text-checkbox {
display: inline-block;
height: auto;
position: relative;
cursor: pointer;
transition: all 0.2s linear;
}
/* color: white;
position: relative;
left: -10px;
font-family: 'Lato';*/
label input[type="checkbox"] {
display: none;
}
Hopefully, the above article has helped you to fully understand and understand how to create a Professional and Responsive Login form. Hopefully, they got their sure answer from this article. If you encounter any problems while creating this login form, you can definitely let me know in the comments. I will help you to create this login form. Special thanks to you for reading the articles to the end.